This chapter will help you navigate through the process of deploying a new VMware Cloud on AWS SDDC.
We will cover the following topics:
- Creating a VMware Cloud Organization
- The VMware Cloud on AWS SDDC provisioning wizard
- Enabling access to vCenter
- RBAC and identity management on vCenter and Cloud Services Platform (CSP)
- Application deployment example
The first step organizations take to start using VMware Cloud on AWS services and get onboarded is to create an Organization. Let’s have a quick recap of the concept of Organizations.
VMware Cloud on AWS service accounts are created within an Organization.
Organizations are the common construct used in all VMware Cloud service offerings. They act as an Identity and Access Management (IAM) tools within the Cloud Services Console.
To get initial access to the platform, users must create a new My VMware account or use an existing one. They should link pre-purchased credits called SPP credits or funds to the Organization’s VMware Customer Connect (formerly MyVMware portal).
VMware Cloud allows users to be associated with multiple Organizations and hold different roles per Organization. Organization owners are given the Organization Owner role and they can invite new users and view billing information. The second role is Organization Member. Both roles allow access to all resources, services, and information of the Organization.
Creating a VMware Organization
The organization’s administrator will receive an invite via email to create an Organization. This is done either after a purchase order has been processed through VMware or AWS, or once a self-service flow with a credit card has been completed.
Note
The link for the creation of an Organization is unique and can be used only one time.
Once the link has been clicked on, a My VMware login prompt will appear, as shown in the following screenshot:
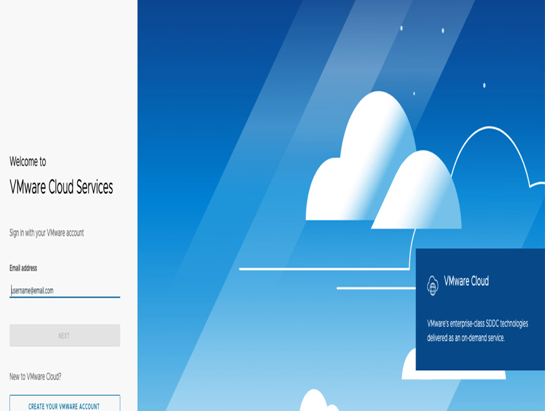
Figure 4.1 – Organization creation initial login with a My VMware account
Once the user credentials are entered, the Organization creation process will start.
First, provide the Organization’s name, agree to the terms of service, and click on CREATE ORGANIZATION AND COMPLETE SIGN-UP, as shown in the following screenshot:
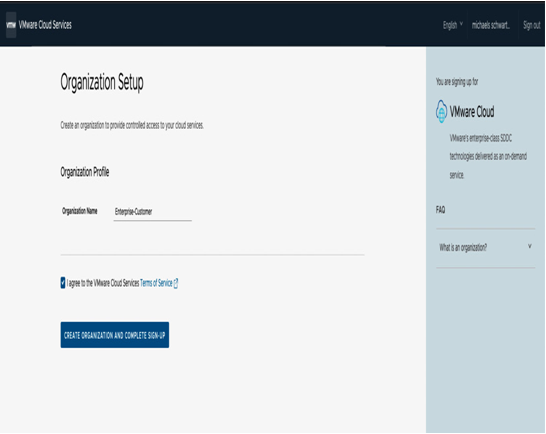
Figure 4.2 – Set up an Organization
After that, administrators will have access to CSP and, from there, can review the information available on the Launchpad and access the inventory of services available within CSP. As seen in the screenshot that follows, on the left-hand side is a navigation pane, which we’ll explore in further detail later, and at the top right-hand side is the newly created Organization name with the user account created based on the My VMware credentials used in the login process.
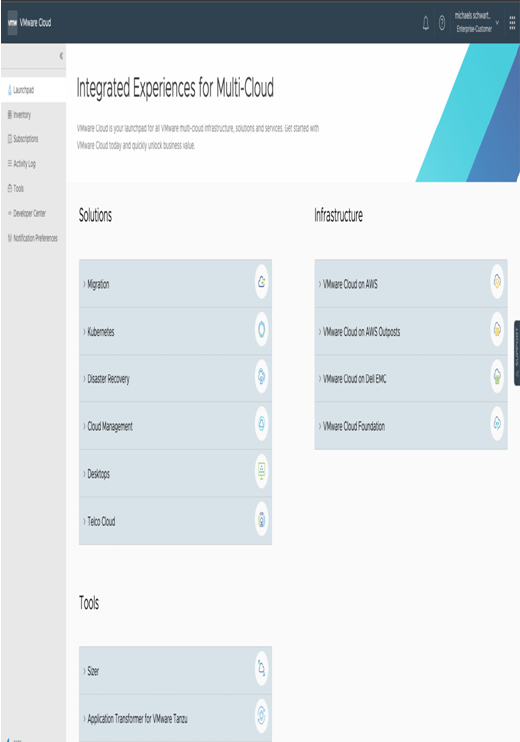
Figure 4.3 – VMware Cloud Launchpad
Click on the upper-right corner of the screen to finalize the account details setup, click on the username and Organization name on the upper-right side, and click on View Organization, as shown in the following screenshot:
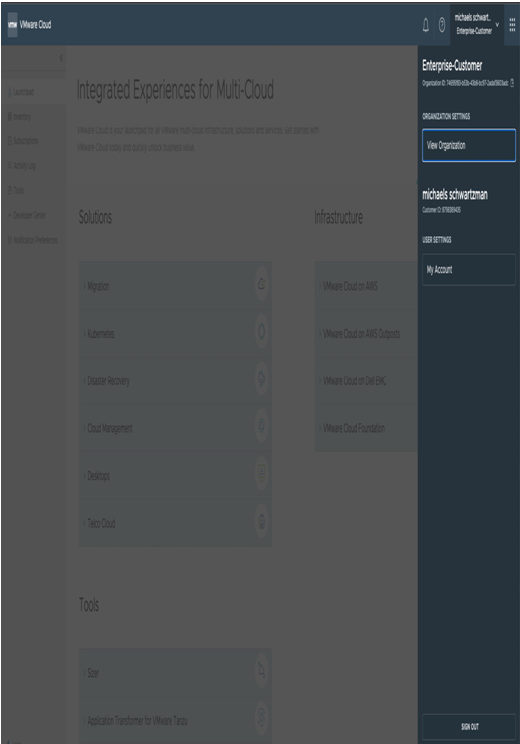
Figure 4.4 – CSP View Organization dropdown
Next, fill in and confirm the correct Organization address.
Note
Missing information in this phase may potentially fail the provisioning process or subscription creation process.
Link a fund (you must use the My VMware account designated as the fund owner) or add a credit card. There could be several funds associated with a single Organization, but only a single default or active fund at a given time needs to be selected, as illustrated in the following screenshot:
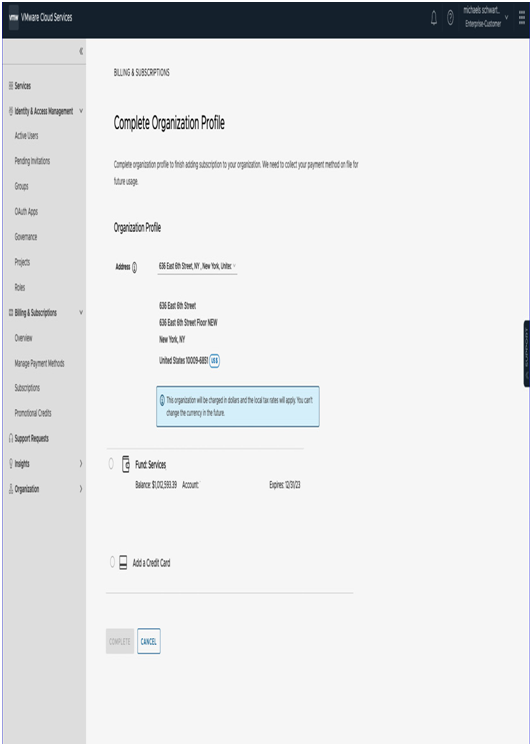
Figure 4.5 – CSP fund selection